Turns out, I'm not the only one who had this thought. Although I did think of this and the use of materials on my own, I was happy to see others had been able to make these! I found this video somewhat helpful, and also somewhat stupid. I also made a few modifications to their technique.
The first thing you do is gather a few sacrificial books. These are books that you don't care about cutting up (sacrilege, I know), but they must also be books that you won't mind having on your shelf. These books must also be pretty big. You also don't want to put scrawny or wimpy books. These will be the foundation for stacking your other awesome books.
In addition to your sacrificial books, you will need some L brackets. I used 5" L brackets. You will also need a box cutter, short screws with a flat head, some glue, some heavy books, and some longer screws to secure your shelf to the wall.
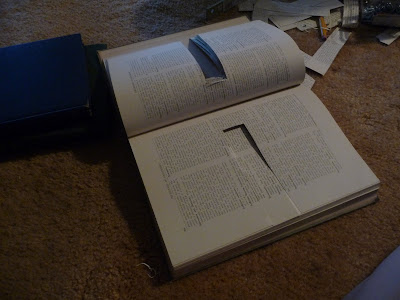
step 1: Open the back flap of the book, measure and mark the middle. From the middle trace the outline of your L bracket
Step 2: Using your box knife, cut out the outline you just made. You're cutting a groove to put you L bracket in. I found it helpful to cut it a little deeper so that your bracket is recessed within the book.


Step 3: Cut a notch in the front cover of the book for the L bracket to fit in. This way, the cover will close flush with the bracket.
Step 4: Secure your bracket to the book using the short screws. These don't have to go all the way through the book, just enough to secure the bracket in place.
Step 5: Next, you secure the back pages with the short screws.
Note: this part is sort of tricky. The pages keep trying to push up against the screw and you have to push it down really hard. If you have weak arms/wrists that your family makes fun of you for - it might be easier to get your hunky husband to do this part.
Note: this part is sort of tricky. The pages keep trying to push up against the screw and you have to push it down really hard. If you have weak arms/wrists that your family makes fun of you for - it might be easier to get your hunky husband to do this part.
Step 6: Finally, glue the back flap closed. The video suggested Elmers glue, but turns out we don't have any glue. I did find some spray adhesive from our headboard project and decided to give it a try. It worked just great! To make sure it really sticks, stack some heavy books on top to smoosh it down.
Once the glue is dry, you can attach the book/bracket to the wall, and think about how smart and crafty you are!
Lastly, stack your favorite books up,
Lastly, stack your favorite books up and admire your work!
.jpg)


.jpg)